Welcome to Taxo Tape
How to Qualify a TIM Supplier for Production: Steps, Tests, and Acceptance Criteria

Introduction
Evaluating a thermal interface material supplier gets you to a shortlist. Qualifying one gets you to production release — and these are two different processes with different objectives, different deliverables, and different levels of rigor.
Supplier evaluation is a comparative exercise: you are assessing whether a supplier has the technical capability, quality system, and commercial reliability to be worth working with. Supplier qualification is a formal verification exercise: you are confirming that a specific product from a specific supplier meets your defined performance requirements under your actual assembly conditions, consistently across multiple production batches, before you commit production volumes to it.
The distinction matters because skipping from evaluation directly to production — treating a successful sample test as sufficient qualification — is where most TIM supply quality problems originate. A single sample batch can pass thermal performance testing by chance even if the supplier's process control is poor. A formal qualification process that tests multiple batches against defined acceptance criteria, including long-term reliability where the application requires it, produces a level of production confidence that no amount of datasheet review can substitute for.
This guide covers the supplier qualification process for thermal interface materials in industrial power electronics — from defining acceptance criteria before testing begins, through first article inspection and thermal performance testing, to batch consistency verification and formal production release documentation. It is the step that follows supplier evaluation and precedes production commitment.
For the preceding step — how to assess and shortlist TIM suppliers before beginning qualification — see our guide on How to Evaluate a Thermal Interface Material Supplier.
Define Qualification Requirements Before Testing Begins
Why upfront definition matters
The most common qualification process failure is starting sample testing before acceptance criteria are written down. Without defined pass/fail thresholds established before testing begins, there is no objective basis for a qualification decision — only subjective judgment about whether the results look acceptable. This creates two problems: qualification decisions that vary depending on who reviews the data, and suppliers who know that borderline results will be accepted if they push back hard enough on the evaluation.
Write the acceptance criteria first. Test against them second. The sequence matters.
Thermal performance targets
Define the thermal resistance target at your specific bond line thickness under your assembly clamping conditions — not a conductivity number from the datasheet. As covered in the thermal conductivity guide, W/m·K is a material property measured under laboratory conditions; thermal resistance in your assembly is what actually determines junction temperature. The qualification criterion should be stated as a maximum acceptable thermal resistance value at defined conditions, not as a minimum conductivity value.
Derive this target from your thermal model: what thermal resistance does the TIM layer need to deliver to keep junction temperature within its rated limit at maximum operating power? Add appropriate margin — typically 10 to 15% — to account for production variation and measurement uncertainty. The resulting value is your pass threshold.
Dimensional and mechanical parameters
Specify the acceptance range for thickness, measured at a minimum of five points across the pad surface, with both a nominal value and a tolerance band. Define the maximum acceptable thickness variation within a single pad — a pad that is within overall tolerance but varies by 0.2mm across its surface will produce non-uniform contact.
For hardness, define an acceptable Shore 00 range around the nominal value. For compression behavior, specify the target bond line thickness at your assembly clamping pressure and the acceptable range around it. These parameters determine how the pad will behave in your assembly, and they need to be in the qualification criteria before testing begins — not added retrospectively when a batch fails thermal testing for reasons that turn out to be mechanical.
Compliance requirements
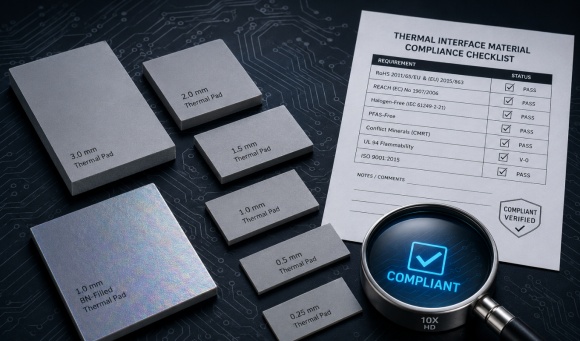
List the compliance requirements that apply to your application as hard pass/fail criteria, not preferences. RoHS compliance with supporting documentation. UL 94V-0 flame retardancy certification at the specific product thickness. Electrical insulation minimum volume resistivity and dielectric breakdown voltage. Any halogen-free or low-volatility specifications required by your end customer or target market.
These are binary criteria — the supplier either has the documentation or does not. Establish them as qualification gates that must be satisfied before thermal testing begins, not as follow-up items to be resolved after the supplier is already producing for you.
Service life requirements
For applications with defined service life targets — telecom equipment, industrial inverters, outdoor LED systems — decide at the qualification planning stage whether accelerated aging data is required as part of qualification, and if so, what test protocol applies. Define the cycle count, temperature range, and post-cycle thermal resistance acceptance threshold before samples are ordered.
Making this decision upfront determines the qualification timeline. Accelerated cycling tests add four to eight weeks to the qualification process. If that time is available before production commitment is needed, include it. If the schedule does not allow it, document the decision and its rationale — accepting the risk rather than pretending the testing was not necessary.
The qualification plan document
Capture all of the above in a written qualification plan before samples are requested. The plan should include the product specification being qualified, the test methods to be used for each parameter, the acceptance criteria for each test, the number of samples and batches required, and the sign-off authority for production release. This document becomes the record that connects the qualification data to the production approval decision.
First Article Inspection: What to Measure on Initial Samples
Purpose of first article inspection
First article inspection (FAI) is the initial check that the samples received match the specification before committing to thermal performance testing. It answers the question: is this the right product, dimensionally and physically, before we invest time in the more involved performance tests?
FAI failures are more common than they should be — incorrect thickness, wrong dimensions from the die-cutting process, surface defects not visible in photographs. Catching these at FAI prevents wasting thermal testing resources on samples that would not pass dimensional acceptance regardless of their thermal performance.
Dimensional verification
Measure thickness at a minimum of five points: four corners and the center of each pad. For larger format pads, add additional measurement points at the midpoints of each edge. Record all values and calculate the mean, minimum, maximum, and range. Compare against your specified tolerance.
A pad that shows thickness variation of more than 0.1mm across its surface — even if the mean value is within tolerance — will produce non-uniform compression under assembly clamping. This matters particularly for large-footprint components like IGBT modules where uniform contact across the full interface is critical.
Measure length and width against the specified dimensions, particularly for custom die-cut pads. Die-cutting tolerance from most TIM manufacturers is ±0.5mm, though tighter tolerances are achievable and should be specified if your assembly requires them. Verify that the cut edges are clean and straight — ragged edges indicate tooling wear that will produce dimensional inconsistency across the production run.
Hardness measurement
Measure Shore 00 hardness using a calibrated durometer on a flat section of the pad away from the edges. Take three readings and average them. Compare against the specified nominal value and your defined acceptance range.
Hardness outside the specified range indicates a formulation or compounding inconsistency. A pad that is significantly harder than specified will not conform adequately to surface roughness under your assembly pressure. A pad that is softer than specified may show higher compression set in long-term service. Either condition warrants rejection at FAI rather than proceeding to thermal testing.
Electrical insulation spot check
For pads used at interfaces requiring electrical isolation, measure volume resistivity on a sample from the batch using a high-resistance meter at the voltage level appropriate for your application. This is a quick check — not a full dielectric qualification — but it confirms that the material is electrically insulating before assembly testing begins.
A reading significantly below the datasheet specification indicates either a contaminated sample or a formulation issue. Either way, it is better to know before the pad is installed in a powered assembly.
Visual inspection criteria
Inspect each sample pad for surface defects before liner removal: tears, pinholes, areas of uneven thickness visible as color or texture variations, contamination visible through the liner, and liner integrity including complete adhesion to both pad faces without lifting or bubbling.
After liner removal on one face, inspect the pad surface directly: confirm uniform color and texture across the full surface, absence of filler particle agglomerates visible as dark spots, and clean edge cuts without torn or folded material at the perimeter.
Document the visual inspection criteria with reference photographs — acceptable and unacceptable examples — so that inspection results are consistent across operators and across time.
FAI pass/fail decision
If samples pass all FAI checks, proceed to thermal performance testing. If any parameter fails, return the samples with a documented non-conformance report and request replacement samples from a new production run — not from the same batch. A batch that fails FAI on thickness or hardness is unlikely to pass thermal testing, and proceeding wastes time. More importantly, understanding why the FAI failure occurred — supplier measurement error, process variation, specification misunderstanding — before proceeding to the next round of samples prevents the same failure from recurring.
Thermal Performance Qualification Testing
Test setup and conditions
Thermal performance qualification should be conducted in your actual assembly under conditions representative of production. This means: your actual component and heatsink, your actual surface finish and flatness, your actual fastener torque applied in your standard sequence, and your actual operating power level or a controlled equivalent.
Document the test setup in detail — component part number, heatsink material and surface finish specification, fastener size and torque value, pad thickness and dimensions, power dissipation level, ambient temperature during testing, and measurement method. This documentation allows the test to be repeated under the same conditions if results are borderline or if re-qualification is needed after a supplier change.
Measurement protocol
For components with accessible junction temperature measurement — through a case temperature sensor or by direct junction temperature readout in the device — measure junction temperature at steady state under a defined power dissipation. Calculate thermal resistance as the junction-to-heatsink temperature difference divided by the power dissipation. Compare against your acceptance threshold defined in the qualification plan.
For components without direct temperature measurement access, mount a calibrated thermocouple at the component case and at the heatsink surface directly beneath it. The case-to-heatsink thermal resistance across the TIM layer is the relevant measurement. This is slightly less direct than junction measurement but provides a reliable TIM-specific resistance value unaffected by junction-to-case resistance variation between devices.
Run each test unit to thermal steady state before recording measurements — typically 15 to 30 minutes at constant power dissipation depending on the thermal mass of the assembly. Record temperature at steady state, not during the transient warm-up period.
Multi-point temperature mapping
For large-footprint components — IGBT modules, power modules with multiple die — a single temperature measurement point does not capture the uniformity of heat transfer across the interface. Use a thermal camera to image the heatsink surface under steady-state conditions and assess temperature distribution across the component footprint.
Non-uniform temperature distribution — hot spots at specific locations, cooler regions at corners — indicates non-uniform TIM contact. This may be caused by pad thickness variation, surface flatness issues, or uneven clamping pressure. A pad that passes a single-point thermal resistance test may still show unacceptable non-uniformity that will affect component reliability in service.
Sample size and statistical validity
Test a minimum of five units for initial thermal performance qualification — not one or two. Five units provides enough data to calculate a mean and standard deviation and to identify whether a single outlier result is a measurement artifact or a real performance issue. For high-reliability applications, ten units is a more defensible sample size.
If all five units pass the acceptance threshold with results clustered near the center of the acceptable range, the qualification data supports production release with confidence. If results are scattered across the acceptance range or if one unit is borderline, the sample size is insufficient to make a confident release decision — test additional units before proceeding.
What constitutes a pass and what triggers rejection
A clear pass: all tested units meet the thermal resistance acceptance threshold, temperature distribution mapping shows acceptable uniformity, and the mean result provides adequate margin above the acceptance limit.
A conditional result requiring investigation: one unit out of five fails while the others pass comfortably, or all units pass but with results clustered at the limit of the acceptance range with minimal margin. In either case, investigate the cause before making a release decision — do not average pass and fail results and declare a pass.
A clear rejection: two or more units fail the acceptance threshold, or temperature mapping shows systematic non-uniformity across all tested units. Return to the supplier with documented test results and request root cause analysis before providing replacement samples.
Long-Term Reliability Testing for Critical Applications
When accelerated aging is required
Not every TIM qualification requires accelerated aging data. For assemblies with short service life targets, serviceable designs where TIM can be replaced in the field, or applications where the thermal cycling amplitude is mild and infrequent, initial thermal performance qualification may be sufficient.
Accelerated aging becomes a qualification requirement when one or more of the following applies: the assembly is sealed and non-serviceable with a service life target of five years or more, the application involves continuous full-load operation rather than intermittent duty, the thermal cycling amplitude is large (more than 40°C delta between minimum and maximum operating temperature), or the end customer specification explicitly requires cycling test data as part of supplier qualification.
For industrial inverters, telecom power equipment, outdoor LED drivers, and battery systems — the application segments covered in separate guides — accelerated aging should be treated as a standard qualification requirement, not an optional enhancement.
Thermal cycling test protocol
Define the cycle profile based on your actual operating conditions. A representative cycle for industrial power electronics typically runs from the minimum expected operating temperature to the maximum expected interface temperature — for example, −20°C to +85°C for an indoor industrial application, or −40°C to +100°C for outdoor equipment. The dwell time at each extreme should be sufficient for the assembly to reach thermal equilibrium — typically 15 to 30 minutes per extreme depending on thermal mass.
A minimum of 500 cycles is appropriate for applications with moderate service life requirements. For equipment with 10-year service life targets operating at two or more thermal cycles per day, 1000 cycles represents a more defensible accelerated test that maps to several years of equivalent operational exposure.
Measure thermal resistance before cycling begins, at defined intervals during the test (500 cycles, 1000 cycles), and immediately after the final cycle. Disassemble a subset of samples after the test and inspect the TIM interface visually for delamination, cracking, or displacement.
Compression set measurement
Before beginning the cycling test, measure pad thickness on each test sample at five points and record the values. After the cycling test is complete and the assembly has returned to room temperature, disassemble and measure thickness again at the same points.
The difference between pre-test and post-test thickness, expressed as a percentage of original thickness, is the compression set under the test conditions. An acceptable compression set threshold for most industrial applications is below 15% after the defined test duration. Higher values indicate that the pad will lose significant thickness in service, increasing bond line thickness and thermal resistance as the product ages.
Post-cycle thermal resistance acceptance threshold
Define the acceptable post-cycle thermal resistance before testing begins — not after seeing the results. A common approach is to set the post-cycle acceptance threshold at 110 to 120% of the initial thermal resistance acceptance value, allowing for modest degradation while requiring that the interface remains functional at the end of its qualified life.
A pad that starts at 0.20 °C·cm²/W thermal resistance and finishes 500 cycles at 0.22 °C·cm²/W has degraded 10% — acceptable for most applications. One that finishes at 0.30 °C·cm²/W has degraded 50% — a meaningful reliability concern for a long-life sealed assembly.
Interpreting accelerated test results for real service life
Accelerated cycling tests compress operational time by increasing cycle frequency and sometimes amplitude. The relationship between accelerated test cycles and real service life is not a simple linear conversion — it depends on the failure mechanism and the degree of acceleration. For TIM qualification purposes, the practical interpretation is straightforward: a pad that shows acceptable thermal resistance and compression set after 1000 accelerated cycles has demonstrated robustness to thermal cycling stress sufficient for qualification in most industrial applications. It is not a guarantee of 10-year performance, but it is meaningfully more informative than initial thermal resistance data alone.
Batch-to-Batch Consistency Verification
Why one batch is not enough
A supplier who delivers one excellent qualification batch and then delivers variable production batches is not a qualified supplier — they are a supplier who got lucky on the timing of your evaluation. Batch-to-batch consistency verification is the step that separates genuine process control from favorable sampling.
The mechanism is straightforward: request samples from three separate production batches, manufactured at different times, before issuing production release approval. Test each batch against the same acceptance criteria used for the first article and thermal performance qualification. The results across three batches tell you whether the first qualification batch was representative of the supplier's normal production or an outlier in either direction.
How many batches and what to measure
Three batches is the practical minimum for consistency verification. Five batches provides stronger statistical confidence but adds qualification time that may not be available for all programs. For critical applications — battery systems, telecom equipment, automotive-adjacent electronics — five batches is the more defensible approach.
Measure the same parameters as first article inspection on each batch: thickness at five points, hardness, and thermal resistance in your assembly on a sample of three to five units per batch. Calculate the mean and range for each parameter across all batches. If results from all batches fall within your defined acceptance range and the batch-to-batch variation is narrow relative to the acceptance band, the supplier demonstrates adequate process control for production release.
If one batch falls outside the acceptance range while others pass, investigate before making a release decision. A single out-of-spec batch among three may reflect a correctable process excursion — request root cause analysis and a corrective action report from the supplier, then test an additional replacement batch before proceeding.
Setting incoming inspection criteria from qualification data
The qualification data across multiple batches establishes the baseline for ongoing incoming inspection. Calculate the mean and standard deviation for thickness and hardness across all qualification batches. Set incoming inspection acceptance limits at the qualification mean ±2 or 3 standard deviations, ensuring that the limits are tighter than your functional acceptance criteria.
This approach grounds incoming inspection in actual production data rather than arbitrary tolerances. A batch that falls within incoming inspection limits but outside the qualification data range triggers early warning before it reaches assembly — which is exactly what incoming inspection is supposed to do.
Establishing the production baseline
Document the mean performance values across qualification batches as the production baseline. This baseline serves two functions: it is the reference against which incoming batch data is compared to detect drift over time, and it is the record that demonstrates what performance level was verified at the time of qualification.
If a supplier changes their formulation or raw material source — a change that should trigger a re-qualification notification under the agreement established in section 7 — the production baseline makes it straightforward to determine whether the change has affected the qualified performance level.
Formal Qualification Sign-Off and Documentation
What the qualification package should contain
The qualification package is the formal record that a specific TIM product from a specific supplier has been verified to meet defined requirements for use in a specific application. It is both the evidence that qualification was conducted properly and the reference document for future supply chain decisions.
A complete qualification package contains: the signed qualification plan with acceptance criteria as originally defined, first article inspection records with measured values and pass/fail determination, thermal performance test data including setup conditions, measured results, and comparison against acceptance thresholds, long-term reliability test data where applicable, batch consistency verification data across the tested production lots, all compliance documentation — RoHS declaration, UL certification, REACH declaration — current at the time of qualification, and the formal release approval signature from the designated authority.
Store the qualification package in a location accessible to both engineering and procurement, with version control that preserves the record if the qualification is subsequently revised or the supplier is replaced.
Approved Vendor List entry
Add the qualified supplier and product to your Approved Vendor List with the following information recorded: supplier name and manufacturing location, product name and part number as it appears on the supplier's documentation, qualified thickness and dimensions, the application or product line for which qualification was conducted, qualification date, qualification package reference number, and the re-qualification trigger conditions.
The manufacturing location entry matters more than it might appear. If the supplier subsequently moves production to a different facility — common in contract manufacturing arrangements — the change should trigger a re-qualification review even if the product specification and part number remain unchanged.
Change notification agreement
Establish a formal change notification requirement with the supplier as part of the qualification completion. The supplier must notify you before implementing any of the following changes: raw material supplier or grade for filler materials, formulation changes to the polymer matrix or flame retardant system, manufacturing process changes that could affect filler loading consistency or thickness uniformity, and production facility changes.
Receipt of a change notification triggers a re-qualification assessment — not automatically a full re-qualification, but a documented evaluation of whether the change scope warrants testing and, if so, what tests are required. A formulation change that affects flame retardant chemistry requires re-testing of UL 94V-0 compliance. A raw material supplier change for filler may require thermal performance re-verification. A production process change with no formulation impact may require only a dimensional inspection of the first post-change batch.
Document the change notification requirement in writing — either in a supplier quality agreement or in the purchase terms — so that it is a contractual obligation rather than a courtesy request.
Handling qualification when the supplier updates their formulation
Formulation updates happen. Raw material availability changes, regulatory updates require reformulation, and suppliers improve their products over time. The question is not whether changes will occur but whether they will be communicated before they affect your production.
When a change notification is received, evaluate it against the qualification baseline. If the change is within the scope covered by your qualification data — for example, a filler particle size adjustment that the supplier has characterized and can show does not affect thermal performance within qualification tolerance — a documented engineering review may be sufficient. If the change is outside the characterized scope, request samples from the post-change formulation and run the relevant qualification tests before authorizing continued production supply.
Conclusion
Supplier qualification bridges the gap between evaluation and production confidence. Evaluation tells you a supplier is worth working with. Qualification confirms that their specific product meets your specific requirements, consistently, before production volumes depend on it.
The process described in this guide — defined acceptance criteria before testing, first article inspection, thermal performance verification in your actual assembly, long-term reliability testing where the application requires it, batch consistency verification across multiple production lots, and formal documentation — is not excessive for industrial power electronics procurement. It is proportionate to the consequence of getting it wrong: field failures that trace back to TIM supplier quality problems are expensive, difficult to diagnose, and entirely avoidable with a proper upfront qualification.
A supplier who supports this process without friction — providing samples from multiple batches on request, supplying complete qualification documentation, committing to change notification in writing — is demonstrating that their quality system is mature enough to be a reliable production partner. A supplier who resists any element of it is telling you something important before production volumes are at stake.
For the preceding step in the supplier management process, see our guide on How to Evaluate a Thermal Interface Material Supplier.
If you would like to begin the qualification process for our thermal interface materials — including samples from multiple production batches, full compliance documentation, and technical support for application-specific testing — contact us with your qualification requirements and we will respond within one business day.