Welcome to Taxo Tape
How to Apply TIM Correctly: A Step-by-Step Process Guide
Introduction
A thermal pad rated at 6.0 W/m·K will not deliver 6.0 W/m·K performance if it is applied to a contaminated surface, misaligned on the component, or compressed unevenly due to inconsistent fastener torque. The datasheet value is a material property measured under controlled laboratory conditions. What happens at the interface in your assembly depends on how the material is handled and installed — and the gap between those two things is where most real-world thermal management failures originate.
This is not a minor consideration. In high-power electronics — inverters, UPS systems, industrial LED drivers, motor drives — a poorly applied TIM that adds 5–10°C of unnecessary junction temperature rise directly shortens component service life. In a production environment where dozens or hundreds of units are assembled daily, a systematic application error affects the entire production population, not just isolated units.
This guide covers the practical side of TIM application: how to prepare surfaces correctly, how to apply pads and grease in a way that consistently achieves the intended interface, how to set and control clamping pressure, and which application mistakes cause the most damage. It is written for process engineers, production technicians, and procurement managers who need to translate a TIM material specification into reliable assembly results.

Surface Preparation Before TIM Application
Why cleanliness matters
The thermal resistance at a TIM interface has two components: the bulk resistance of the pad or grease itself, and the contact resistance at both mating surfaces. Contact resistance is determined by how well the TIM fills the microscopic gaps between its surfaces and the component and heatsink. Contamination on either surface introduces a physical barrier between the TIM and the metal — one that the TIM cannot displace under normal assembly pressure.
A thin film of machining oil on a heatsink surface, invisible to the eye, can add measurable thermal resistance at the interface. Oxidation on an aluminum surface that has been sitting in storage creates a rougher, less conductive layer that reduces effective contact area. Residue from a previously applied grease or pad that was not fully removed before reassembly creates a mixed-material interface with unpredictable properties.
Contamination sources to address
Machining and handling oils are present on most bare metal surfaces that have not been explicitly cleaned before assembly. Even surfaces that appear clean have residual oil from handling if they have been touched with bare hands — fingerprint oils are sufficient to affect contact quality at a precision interface.
Oxidation develops on aluminum surfaces over time, particularly on bare (non-anodized) aluminum that has been stored without protection. The oxide layer itself has lower thermal conductivity than the base aluminum and a rougher surface texture.
Previous TIM residue is a common contamination source in rework situations. Thermal grease that is partially wiped away leaves a thin, uneven residue layer. Pad adhesive residue from a pressure-sensitive adhesive thermal pad that was peeled off remains on the surface and must be removed before a new TIM is applied.
Recommended cleaning procedure
Use isopropyl alcohol (IPA) at 99% purity minimum. Lower concentrations contain water that leaves residue on the surface and takes longer to evaporate. Acetone is effective for heavier grease contamination but evaporates very quickly and can leave residue if used on large surface areas — IPA is the more reliable general-purpose choice.
Apply the solvent to a lint-free wipe — not directly to the surface — and wipe in a single direction rather than a circular scrubbing motion. Circular wiping redistributes contamination across the surface rather than removing it. Follow with a second clean wipe to confirm the surface is clean. Allow full solvent evaporation before applying TIM — typically 30 to 60 seconds at room temperature for IPA on aluminum.
In production environments, pre-cleaned and individually packaged wipes eliminate the solvent handling variable and reduce contamination risk from wipe reuse.
Surface roughness: when it matters
For soft, conformable TIMs — silicone pads in the Shore 00 20–50 range, dispensed gap fillers — moderate surface roughness (Ra up to 1.6 µm) is accommodated by the material's compliance under assembly pressure. The TIM flows into surface peaks and valleys and achieves good contact across the interface area.
For harder pads and thin adhesive tapes, surface roughness matters more. A hard pad that cannot deform sufficiently to fill surface irregularities will have reduced real contact area, and the thermal resistance will be higher than the datasheet value regardless of the nominal conductivity. For assemblies using harder TIM materials, specifying a maximum surface roughness on the heatsink drawing is worth the additional machining cost.
Anodized vs. bare aluminum
Anodized aluminum surfaces are harder and more dimensionally consistent than bare aluminum, and the anodize layer provides electrical insulation and corrosion resistance. For TIM application, anodized surfaces are generally preferable — they are more stable over time, less susceptible to oxidation, and provide a consistent surface for the TIM to contact.
Bare aluminum requires more attention to oxidation control in storage and pre-assembly handling. If using bare aluminum heatsinks, clean immediately before TIM application rather than cleaning in advance and storing — the oxide layer begins reforming within minutes of cleaning in humid environments.
Applying Thermal Pads: Step-by-Step
Selecting the right pad size
The pad should cover the full thermal interface area — the component footprint plus a small margin of 1–2mm on each side where practical. Undersized pads that do not cover the full component footprint leave exposed areas where heat transfer is limited to the air gap, which has negligible thermal conductivity. The edge regions of a component footprint may carry less heat flux than the center, but leaving them uncovered creates uneven temperature distribution across the component.
Oversized pads that extend significantly beyond the component footprint are not a thermal problem but can create mechanical issues — excess material folding or bunching under assembly pressure, interfering with adjacent components, or complicating automated assembly. Cut pads to size where necessary using a clean straight edge and a sharp blade to avoid tearing the pad edge.
Handling without contaminating contact surfaces
Thermal pads are supplied with protective liners on both contact faces. Keep the liners in place until immediately before application. Handle pads by their edges or through the liner material — skin contact with the pad surface transfers oils that reduce contact quality. In production environments where high volumes are handled, disposable gloves eliminate this variable entirely.
Inspect the pad surface after liner removal. Any visible contamination, tears, or uneven thickness in the pad material is cause to discard and replace. Pads are low-cost relative to the components they protect; do not compromise the interface to save a pad.
Liner removal sequence
Most thermal pads have a release liner on each face — one side typically releases more easily than the other. Remove the easier-release liner first and use that face to position and align the pad on the surface where it will be placed. With the pad correctly positioned and lightly tacked down, remove the second liner from the exposed face immediately before bringing the mating surface into contact.
Attempting to remove both liners before positioning increases the risk of the pad folding onto itself or picking up contamination from the work surface before it can be installed.
Positioning and alignment before compression
With one liner removed, place the pad on the heatsink surface or component face with correct alignment before applying any compression. Once a soft pad contacts a surface it will tend to stick, making repositioning difficult without contaminating or stretching the pad. Take the time to align correctly on the first placement.
For pads with adhesive on one face, the adhesive side goes against the surface that needs to be held in position during assembly — typically the heatsink or mounting surface rather than the component face, to avoid adhesive contact with component leads or pads.
Confirming correct seating after fastener torque
After assembly and fastener torque, inspect the pad at the perimeter of the component footprint. A correctly compressed pad will show slight lateral expansion at the edges — a thin ring of pad material visible around the component perimeter. This confirms the pad has made contact and compressed to working thickness across the full interface.
If no lateral expansion is visible, the pad may be under-compressed due to insufficient fastener torque or an unexpectedly large gap. If the pad has extruded significantly beyond the component footprint, the gap was smaller than expected or the pad was too thick for the assembly — both situations warrant investigation.
What over-compression looks like
A pad compressed beyond its rated compression limit will show excessive lateral extrusion, potential tearing at the edges, or visible deformation of the pad structure. In extreme cases, the pad material may be forced between component leads or into adjacent assembly features. Over-compression also risks mechanical stress on the component package itself — particularly for ceramic-packaged devices that are sensitive to non-uniform pressure.
The rated compression range is stated on the datasheet as a percentage of nominal thickness or as a minimum thickness under load. Stay within this range by controlling fastener torque to the value calculated from the pad's compression stress curve at your target bond line thickness.
Applying Thermal Grease: Step-by-Step
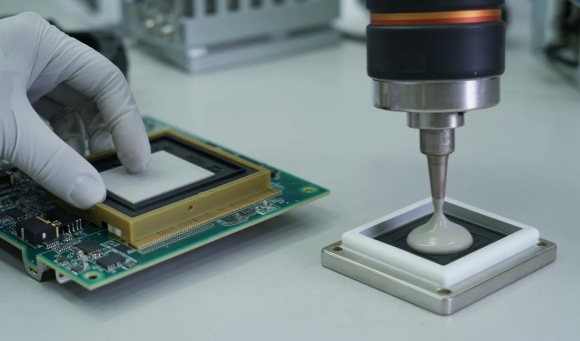
How much grease to apply
Over-application is the most common grease application mistake in production. The correct quantity of grease is the minimum amount that produces a continuous, void-free bond line across the full component footprint after compression. Excess grease beyond this amount does not improve thermal performance — it migrates to the edges under compression and potentially contaminates adjacent components or board areas.
For a standard power component with a 20 × 20mm footprint, a dot of grease approximately 3–5mm in diameter at the center of the footprint is sufficient for most grease viscosities. The correct quantity varies with grease viscosity, component footprint geometry, and assembly pressure — establish the right amount for your specific assembly through a spread test before production, not by estimation.
Spreading methods
Three application patterns are commonly used, each suited to different component footprint geometries:
A center dot works well for square and near-square footprints. The grease spreads radially outward under compression and covers the footprint evenly if the quantity is correctly calibrated. This is the simplest method and the easiest to apply consistently in production.
A line application — a single bead of grease across the center of a rectangular footprint parallel to the short axis — works better for elongated footprints where a center dot would not reach the ends before the edges are already fully covered. The line spreads laterally under compression.
A cross pattern — two intersecting lines — is sometimes used for larger footprints where a single dot or line may leave coverage gaps at the corners. It requires more precise quantity control than a center dot.
For IGBT modules with large footprints (40mm × 50mm and above), a multi-dot or serpentine pattern may be required to achieve full coverage — establish the correct pattern through spread testing in your specific assembly.
Why hand spreading introduces problems
Spreading grease manually with a spatula, card, or finger before assembly seems intuitive but creates more problems than it solves in a production context. Manual spreading introduces contamination from the spreading tool or from skin contact. It produces thickness variation across the spread area — thicker at the edges of the spreading stroke, thinner at the center. And it adds a process step that is difficult to control consistently across operators and shifts.
The compression-spread method — applying the correct quantity at the center and allowing assembly pressure to distribute it — produces more consistent bond line thickness and requires fewer process steps. Reserve manual spreading for rework situations or prototyping; do not use it as the standard production method.
Achieving consistent bond line thickness in production
Bond line thickness for grease is determined by the component mounting pressure and the surface flatness of both mating surfaces. Unlike pads, grease has no inherent thickness — it flows until it reaches equilibrium between the applied pressure and its viscous resistance.
Consistent bond line thickness in production requires consistent fastener torque (torque-controlled tools, not hand tightening), consistent surface preparation (same cleaning procedure every unit), and consistent grease quantity (dispensing equipment with calibrated volume output, not manual syringe application). Any of these three variables, left uncontrolled, produces bond line thickness variation unit-to-unit that shows up as junction temperature variation across the production population.
What a correctly applied interface looks like after assembly
After assembly and fastener torque, a small, continuous bead of grease should be visible around the entire perimeter of the component footprint — indicating that grease has spread to all edges and that the bond line is continuous with no dry areas. The bead should be roughly uniform in width around the perimeter; a thick bead on one side and a thin or absent bead on the opposite side indicates uneven spreading, possibly from non-parallel mating surfaces or uneven fastener torque.
If grease is visible only on some sides of the component, the application quantity may be insufficient or the fastener torque sequence may be causing the component to tilt during assembly. Both situations warrant process investigation before continuing production.
Clamping Pressure and Fastener Torque
Why clamping pressure directly affects thermal resistance
Thermal resistance at a TIM interface decreases as clamping pressure increases, up to the point where the pad reaches its minimum rated thickness. Higher pressure compresses the pad further, reduces bond line thickness, and improves surface contact by forcing the TIM material into surface irregularities on both mating faces. The relationship between pressure and thermal resistance is not linear — the largest gains come from moving from zero pressure to moderate pressure, with diminishing returns above the pad's recommended compression range.
This means that two identical assemblies with different fastener torque values will measure different junction temperatures under the same load. The difference is not in the material — it is in how the material was installed.
Under-torque: incomplete compression and air pockets
Insufficient fastener torque leaves the pad partially compressed. In the uncompressed regions, the pad may not make full contact with one or both mating surfaces, leaving microscopic air gaps at the interface. Air has thermal conductivity around 0.026 W/m·K — roughly 100 to 200 times lower than a typical thermal pad — so even small air pockets contribute disproportionately to total interface resistance.
Under-torque is a particularly common problem in assemblies where the fasteners are installed by hand without torque control, or where the torque specification is not clearly defined in the assembly documentation. The assembly looks correct visually — the fasteners are tightened, the component is seated — but the thermal interface is not performing at the specified level.
Over-torque: pad damage and component stress
Exceeding the pad's rated compression limit causes physical damage to the pad material. The polymer matrix and filler structure can fracture under excessive compressive stress, permanently altering the pad's mechanical properties and creating uneven thickness distribution across the interface. In some cases, over-compressed pad material extrudes into adjacent areas of the assembly, creating potential short circuits or mechanical interference.
Beyond the pad itself, over-torque generates compressive stress in the component package. Ceramic-packaged power devices — IGBTs, SiC modules, high-power diodes — are brittle and can crack under non-uniform compressive load from over-torqued fasteners. PCB warpage from excessive clamping force is a related failure mode, particularly in assemblies with multiple closely spaced fasteners on a thin board.
How to determine the correct torque value
The correct fastener torque for a given assembly is the value that compresses the pad to its target bond line thickness under the specific fastener geometry, pad dimensions, and component footprint size. This cannot be read directly from the pad datasheet — it requires calculation or empirical determination for each assembly.
The starting point is the pad's compression stress curve: the relationship between compressive pressure (in psi or kPa) and resulting thickness. From the target bond line thickness, read off the required pressure. Convert pressure to fastener torque using the fastener geometry and friction coefficient — standard fastener torque-tension relationships apply. Verify the calculated torque by measuring actual bond line thickness after assembly in a sample build.
For assemblies where the gap dimension varies in production, define a torque range rather than a single value, bounded by the pad's minimum and maximum rated compression.
Torque sequence in multi-fastener assemblies
In assemblies with four or more fasteners — IGBT module mounting, large heatsink attachment — the sequence in which fasteners are tightened affects how evenly the clamping load is distributed across the interface. Tightening fasteners sequentially around the perimeter draws the component down unevenly, with the first fastener side compressing more than the last. This produces a tilted interface with non-uniform bond line thickness.
The correct sequence is a cross pattern: tighten opposite fasteners in pairs, working from the center outward. For a four-fastener arrangement, the sequence is 1 → 3 → 2 → 4 (diagonally opposite pairs). For larger fastener patterns, apply torque in two or three passes at increasing torque values rather than reaching final torque in a single pass. This produces more uniform compression across the full interface area.
Production line torque control
Hand-tightening introduces operator-to-operator variation that is incompatible with consistent thermal interface quality in production. Studies of hand-tightening consistency typically show ±30–50% variation in applied torque across operators — a range that spans from under-torque to over-torque for most thermal pad assemblies.
Torque-controlled electric screwdrivers or pneumatic torque tools with calibrated clutch settings are the minimum standard for production TIM assembly. Torque wrenches are appropriate for lower-volume or prototype assembly. Document the torque specification in the assembly work instruction, verify tool calibration on a defined schedule, and include torque application in operator training for any assembly involving thermal interface materials.
Common Application Mistakes and Their Consequences
Reusing a thermal pad after disassembly
A thermal pad that has been compressed to working thickness and then removed from the assembly has been permanently deformed. Its thickness is reduced, its surface texture has conformed to the specific surfaces it was in contact with, and its mechanical properties have changed under the compression it experienced. Reinstalling it produces a different interface than the original — thinner, potentially with surface contamination picked up during removal, and with different compression behavior.
The consequence is unpredictable thermal resistance at the reassembled interface. For any disassembly that involves removing a thermal pad — rework, field service, component replacement — replace the pad with a new one. The cost of a new pad is negligible relative to the cost of a thermal failure caused by a reused one.
Applying TIM to a dirty or oxidized surface
As covered in section 2, contamination between the TIM and the mating surface adds contact resistance that no material conductivity value can overcome. This mistake is particularly common in rework situations where the previous TIM is removed but the surface is not properly cleaned before the new TIM is applied. Grease residue, adhesive residue from pad liners, and oxidation from a surface that has been exposed to air during a disassembly wait period all contribute.
The consequence ranges from marginally elevated thermal resistance in mild cases to complete thermal failure in severe ones — a component running 15–20°C above expected temperature because the TIM is effectively sitting on a contamination layer rather than making metal contact.
Using too much or too little grease
Too little grease leaves dry areas in the bond line where the grease did not spread fully under compression. These dry spots have no thermal conductivity and create hot spots on the component surface directly above them. Too much grease migrates beyond the component footprint under compression, potentially contaminating PCB pads, component leads, or adjacent components. Excess grease also makes rework more difficult and time-consuming.
Neither error is visible after assembly without disassembly inspection — both assemblies look identical from the outside. The difference shows up in thermal measurements or, eventually, in field failures.
Misaligning the pad so it overhangs the component edge
A pad positioned so that a portion hangs over the edge of the component footprint will fold or bunch at the edge when compressed, creating a thicker region at the overhang that pushes the component away from the heatsink surface at the opposite side. The result is a wedge-shaped bond line — thinner where the pad is properly positioned, thicker or lifted at the opposite edge — with non-uniform thermal resistance across the component.
This is a common error in manual assembly where the operator positions the pad by eye rather than using a fixture or alignment guide. In production, a simple positioning fixture that locates the pad relative to the component or heatsink mounting features eliminates this variable.
Mixing incompatible TIM types at the same interface
Applying a new TIM over residue from a different TIM type — particularly mixing silicone-based and non-silicone materials — produces an interface with unpredictable properties. The two materials may not be chemically compatible, the mixed layer has different thermal and mechanical properties than either material alone, and the resulting bond line thickness is uncontrolled.
This occurs most often in rework when a component is replaced and the technician applies new grease over partially removed old grease, or applies a pad over a surface that still has dried grease residue. The correct procedure is always full removal and surface cleaning before applying any new TIM, regardless of type.
Skipping re-application after rework or component replacement
A thermal pad or grease application that was disturbed during component removal — even if the component was carefully lifted rather than slid — should be treated as compromised and replaced. The act of separating the mating surfaces breaks the intimate contact at the interface and introduces air and contamination. Reassembling with the disturbed TIM in place is not the same as the original assembly, and the thermal performance will reflect that.
This applies equally to field service situations where a component is replaced by a technician who may not be familiar with thermal interface requirements. Service documentation should explicitly specify TIM re-application as a required step in any component replacement procedure, not an optional one.
Quality Control in Production TIM Application
Visual inspection criteria after assembly
Visual inspection after assembly provides a first-pass quality check without requiring thermal measurement equipment. For grease applications, inspect for the continuous perimeter bead described in section 4 — confirming full coverage and even spreading. For pad applications, inspect the pad edge around the component perimeter for even compression and the absence of folding or misalignment.
Establish documented pass/fail visual criteria with reference photographs showing acceptable and unacceptable conditions. Visual criteria should cover: grease bead continuity and uniformity, pad alignment relative to component footprint, evidence of pad damage or tearing, and absence of TIM contamination on adjacent board areas.
Bond line thickness verification
For critical interfaces — high-power IGBT modules, components with tight thermal budgets — spot-check bond line thickness on a sample basis using a calibrated thickness gauge. Measure at multiple points across the component footprint to detect tilt or non-uniform compression. Compare measured BLT against the target range derived from the pad compression curve and thermal model.
For grease applications, bond line thickness can be verified indirectly by weighing the grease applied per unit — a calibrated dispensing system with weight verification catches over- and under-application before assembly rather than after.
Detecting insufficient contact without thermal testing
Thermal resistance testing requires powered operation and temperature measurement equipment, which is not practical for 100% production inspection. Several indirect methods can identify insufficient contact without full thermal testing.
Ultrasonic scanning — used in high-reliability applications — images the bond line and detects air voids and delamination without disassembly. It is cost-effective for high-value assemblies but adds process time and equipment cost.
For lower-cost production inspection, a pull or shear test on a sample basis confirms that the pad has made adhesive contact with both surfaces. While this does not directly measure thermal resistance, it confirms intimate surface contact which is a prerequisite for thermal performance.
Incoming inspection for thermal pads
Do not assume that incoming pad material matches the datasheet values without verification. At minimum, inspect incoming batches for dimensional consistency — thickness measured at multiple points across a sample of pads per batch, compared against the specified tolerance. Hardness spot-checks using a Shore 00 durometer provide a quick mechanical property check.
For critical applications, periodic thermal resistance measurements on production samples from each batch — using a simple test fixture and thermal camera — provide assurance that the material is performing as specified. Establish batch acceptance criteria and a process for handling out-of-spec deliveries before they enter production.
Documentation and traceability
For any assembly where thermal interface quality is safety-relevant — battery packs, high-power industrial equipment, automotive electronics — maintain traceability records linking the TIM batch number to the production units it was used in. If a batch quality issue is identified after production, traceability records allow targeted field action rather than a broad recall.
Document the TIM specification, application procedure, and inspection criteria in the assembly work instruction at the same level of detail as any other critical process step. TIM application is not a minor detail — treat it accordingly in the production documentation.
Conclusion
Material selection and application quality are not independent variables in thermal interface management — they are both required, and neither compensates for failure in the other. A 6.0 W/m·K BN-filled pad applied to a contaminated surface with under-torqued fasteners will deliver worse thermal performance than a 3.0 W/m·K pad applied correctly to a clean surface with controlled clamping pressure. The datasheet value sets the ceiling; the application process determines how close you get to it.
The practical implication for production operations is that TIM application needs to be treated as a controlled process with defined parameters — surface preparation procedure, application method, fastener torque specification and sequence, and visual inspection criteria — not as a background task left to individual operator judgment.
For engineering teams working on new designs, the application process should be validated alongside the material specification. A material that performs excellently in a lab assembly fixture but is difficult to apply consistently on a production line is not a good production specification, regardless of what the datasheet says.
If you are working through TIM selection or application process development for a specific assembly and need material recommendations or samples for evaluation, contact us with your component details and assembly configuration. If you're troubleshooting an existing production issue rather than setting up a new process, see TIM Application Failures in Power Electronics Production: Root Causes and Fixes for a diagnostic framework organized by failure symptom.